Baseball camp packing needs normal camp items plus activity gear that gets dirty quickly. The best list separates regular clothing from field gear so practice items do not take over the whole duffel.
Confirm the equipment list
Some camps provide bats, helmets, balls, or protective gear, while others expect campers to bring personal equipment. Check the camp list before packing anything bulky or expensive.
Label personal gear clearly and avoid packing restricted or unnecessary items.
Add extra socks and laundry space
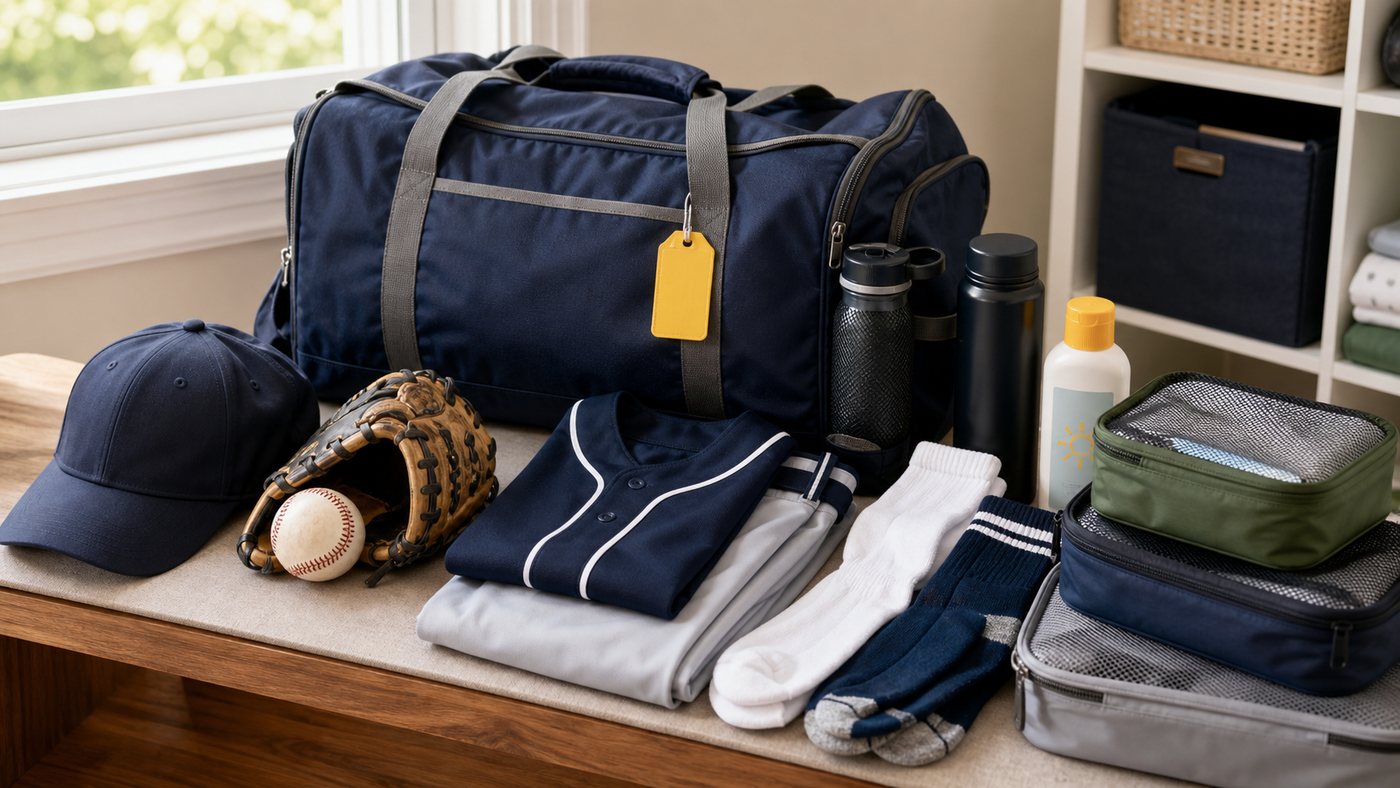
Athletic socks, practice clothes, and a laundry bag matter because sports camp creates more dirty clothing than a normal overnight trip. Add a water bottle, sunscreen, cap, and towel for hot activity days.
Keep toiletries and clean clothes away from field gear in separate pouches.
Protect the travel-day kit
ID, camp paperwork, medicines, phone, charger, emergency contact card, and snacks should stay accessible. If the camper is flying, follow current airline and TSA guidance for liquids and carry-on items.
How to make the list useful
Baseball camp packing should separate field gear from clean clothes. Practice items get dirty fast, and the bag needs a plan for laundry and damp towels.
- Glove, cap, athletic socks, and practice clothes
- Water bottle and sunscreen
- Camp documents and medicine
- Laundry bag and clean clothing pouch
What to remove before closing the bag
Confirm whether the camp provides bats, helmets, balls, or protective gear before packing bulky equipment. Label personal gear clearly if it must travel.
A shorter list is not automatically better, but every item should have a reason tied to the trip. If an item is easy to replace, provided by lodging, not allowed by the program, or unlikely to be used, it should be removed before essentials are cut.
Real-world packing check
Keep a clean travel outfit separate from field clothing. The return trip is easier when sweat, dirt, and sunscreen do not mix with every item in the duffel.
Before leaving, do one final pass by routine: travel day, arrival, first night, first morning, main activity, hygiene, medicine, charging, and the return home. That routine check catches more problems than rereading a generic alphabetical list.
Quick reference
- Keep documents, medicine, phone, wallet, keys, and chargers accessible.
- Pack clothing by days and activities, then reduce bulky duplicates.
- Use a separate place for dirty, damp, or return-trip items.
- Verify current airline, camp, TSA, FAA, CDC, and destination guidance when rules matter.
Starter checklist
- Confirm trip length, luggage type, weather, and the activities that are actually on the schedule.
- Pack documents, medicines, chargers, wallet, keys, and phone in the bag that stays with you.
- Choose clothing quantities by day, then reduce bulky duplicates such as shoes, jackets, and full-size toiletries.
- Add one small first-day kit so arrival does not depend on unpacking every bag.
- Check official airline, camp, TSA, FAA, CDC, and destination rules before packing anything that may be restricted.
Common mistakes to avoid
The easiest way to overpack is to add every just-in-case item before the essentials are finished. Pack essentials first, then recommended items, then optional extras only if there is room and a clear use case. The easiest way to underpack is to forget routines: morning, activity, shower, medicine, sleep, travel day, and the return home. Walk through those routines once before closing the bag.
Use this with the generator
Open the packing list generator, choose the closest trip type, then adjust days, weather, luggage, travelers, and activities. Print or copy the result before you start packing so the checklist stays usable offline. If a category feels too large, remove optional extras first rather than deleting documents, medicine, chargers, or first-day essentials.